
Before you start
- Free up at least 212 GB. The install takes up to 212 GB. A launch PS5 has about 667 GB of usable space and an Xbox Series S (512 GB) about 364 GB, so you may need to delete other large games or move them to external storage.
- Buy codes for your own region. A PS5 code only works on an account from the country or region where the code was sold. Xbox codes have no region lock.
- Redeem a physical copy’s code early. The physical release is Standard Edition only, with a download code inside the box. On PS5, enter it under Redeem Code in PlayStation Store.
- Note your GTA+ deadline. Digital pre-orders and purchases made by November 19 include one month of GTA+. Redeem it by March 31, 2027, on PS5, or within 180 days on Xbox. On PS5 it renews at the monthly price after the first month, so cancel within a month of redeeming if you don’t want to keep it.
- Set up subtitles before you play. Conversations keep going while you drive, so adjust the subtitle size and background in the settings first (Opening the settings). On PS5, you can also turn down DualSense vibration in the accessibility settings.
If a download stalls, use the PS5 option to keep downloading in rest mode, or pause the download and resume it. Account, download and code problems go to PlayStation or Xbox support; in-game bugs and patches go to Rockstar Support (support.rockstargames.com).
Opening the settings, and what to change before you play
Open Settings from the pause menu and move between the tabs along the top with L1 and R1 (LB and RB on Xbox). If you lose track of what you’ve changed, the controls at the bottom of the screen reset either the current tab or everything to the defaults.
| Tab | What it covers |
|---|---|
| Control Scheme | Pick a button layout (default, Classic or left-handed) and view the mapping for on foot, aiming a gun, unarmed fighting, cars and boats, aircraft, bicycles, swimming and parachuting (Controls) |
| Controller | Look and aim sensitivity, plus vertical and horizontal inversion. On PS5, DualSense vibration and adaptive triggers |
| Gameplay | Combat, movement and accessibility, including the options that make the game easier |
| Display | Brightness, effects such as motion blur, and high-contrast shaders. There is no quality or performance mode to choose |
| UI | Text size, subtitles, navigation, the aiming reticle, notifications, health and vehicle status displays, and units of distance |
| Camera | Separate cameras for on foot, cars and boats, aircraft, underwater and cinematic view, plus the options that cut down screen shake |
| Audio | Output, volume levels and narration |
| Account | Your Rockstar account and the terms |
Quick fixes for common problems
| Problem | Where to go and what to change |
|---|---|
| No subtitles for street chatter or phone calls | UI subtitles: the default is Mission Only, so switch them to On. You can choose from three text sizes and add a background and speaker names |
| Clicking in the stick every time you run gets tiring | Movement Speed in Gameplay: change it from the default Walk to Jog or Run. Push the left stick all the way and you’ll break into a run without pressing L3 |
| Your aim won’t settle on enemies in a gunfight | Targeting in Gameplay: Lock-On gives the most help, followed by Partial and then Free Aim. If you shoot from cars a lot, turn on Drive-By Assist too |
| The picture feels smeary, or you get motion sick | Motion Blur Strength in Display, plus Camera: drop motion blur from its default of 3 to 0. In the camera tab, turn off the options that shake the screen for explosions, crashes and gunfire. Raising the camera height makes it easier to see the traffic and people around you |
| Your fingers or hands get sore over long sessions | Controller, and Tap Assist in Gameplay: vibration and haptics start at the maximum of 10, so bring them down to a level you like. You can also lighten the adaptive trigger resistance. Tap assist turns rapid button presses into a hold or a single press |
| The ringing after explosions is hard on your ears | Tinnitus Reduction in Audio: turn it on |
| You want to stream or record | Mute Licensed Music in Audio: with it on, licensed songs on the radio stay silent |
Making the game easier
There is no difficulty setting. If you keep dying in fights, switch on Accessible Combat in Gameplay so enemies go down more easily and hits hurt you less. If your car falls apart halfway through every getaway, turn on Reduced Vehicle Damage. Both can be toggled from the pause menu at any time, so you can use them for one tough spot and switch them off again afterward.
Controls (PS5 and Xbox)
These are the default controls. Context actions such as getting out of a vehicle or opening a door all live on Triangle (Y on Xbox), while Cross jumps and Circle crouches. Unlike earlier games in the series, you sprint by clicking L3 rather than tapping Cross over and over.
On foot
| Action | PS5 / Xbox |
|---|---|
| Walk, look around | Left stick, right stick |
| Run click again to sprint flat out | Click L3 / click LS |
| Jump, climb | Cross / A |
| Crouch | Circle / B |
| Open doors, pick things up, get in | Triangle / Y |
| Take cover | R1 / RB |
| Punch | Square / X |
| Aim, fire | Hold L2 and press R2 / hold LT and press RT |
| Talk to people | Hold L2 / hold LT |
| Holster or draw your weapon | Tap L1 / tap LB |
| Weapon wheel | Hold L1 / hold LB |
| Look behind you | Hold R3 / hold RS |
| Focus | L3 and R3 together / LS and RS together |
| Phone hold for WAiNK | D-pad up |
| Map | Touchpad / View button |
| Pause menu | OPTIONS / Menu button |
| Current objective and minimap | Tap d-pad down |
| List of nearby shops and missions | Hold d-pad down |
| Radio hold for the radio menu | D-pad left |
| Detonate planted explosives | Tap d-pad right |
| Give your partner orders | Hold d-pad right |
| Switch characters | Hold d-pad right, then R1 / RB |
Aiming a gun
| Action | PS5 / Xbox |
|---|---|
| Zoom the scope in or out | D-pad up, down |
| Swap the shoulder you aim over | D-pad left |
| Quick-switch to your other weapon | Triangle / Y |
| Quick-throw the throwable in your hand | Hold R1 / hold RB |
Hand-to-hand fighting
| Action | PS5 / Xbox |
|---|---|
| Move while staying locked on to your opponent | Hold L2 / hold LT |
| Punch, kick | Square / X |
| Grab | R2 / RT |
| Block, dodge | Cross / A |
Cars, motorcycles and boats
Cars, motorcycles and boats all share the same layout.
| Action | PS5 / Xbox |
|---|---|
| Accelerate | R2 / RT |
| Brake, reverse | L2 / LT |
| Handbrake | Cross / A |
| Horn nitrous on cars fitted with it | Click L3 / click LS |
| Headlights | Tap Circle / tap B |
| Duck down in your seat | Hold Circle / hold B |
| Turn signals | Tap d-pad left or right |
| Vehicle menu | Hold d-pad left |
| Look behind you | Hold R3 / hold RS |
| Shoot out of the window | R1 / RB |
| Get out press twice while moving to bail out | Triangle / Y |
Swimming, flying, bicycles and parachutes
| Action | PS5 / Xbox |
|---|---|
| Swimming: swim faster, dive, surface | L3, R1, Cross / LS, RB, A |
| Aircraft: pitch and roll | Left stick |
| Aircraft: throttle up, throttle down | R2, L2 / RT, LT |
| Aircraft: yaw left and right | Square and Circle / X and B |
| Aircraft: raise or lower landing gear | Click L3 / click LS |
| Bicycle: pedal, brake | R2, L2 / RT, LT |
| Bicycle: pedal standing up, hop, bell | Cross, Circle, L3 / A, B, LS |
| Parachute: open, cut away | Cross, Triangle / A, Y |
| Parachute: steer left and right | L2, R2 / LT, RT |
Changing the layout
The Control Scheme tab in the settings offers three layouts: the default, a Classic layout closer to earlier games, and a left-handed one.
- Classic. Sprint moves to Cross (A on Xbox), jump to Square (X), punch to Circle (B) and crouch to L3. To run, keep pressing Cross.
- Left-handed. Swaps the two sticks, L1 with R1 and L2 with R2. The face buttons and the d-pad stay where they are.
- Fewer button holds. Aiming, inspecting, the weapon wheel and nitrous can be set to toggle with a single press instead of being held. For running, you can choose between running only while the button is held and a single press that keeps you running.
- Touchpad. On PS5, the touchpad can switch the camera view instead of opening the map.
Fast travel: skipping the trip with a taxi or RydeMe
You can’t pick a point on the map and jump there instantly. Instead, call a ride, get in, and pay $100 on top of the fare to skip the journey and arrive straight away. If you don’t pay, you can ride the whole way for just the fare.
Paradise Taxi (after the first mission)
- Call from your phone. Bring out the phone with up on the d-pad and ring Paradise Taxi in your contacts.
- Wait where you called from. The cab shows up on the minimap as a white car icon. Wander too far from the pickup point and the booking is canceled.
- Choose where to go. Once you’re in, pick a destination on the map. If you placed a marker before getting in, you can use that as the destination.
- Skip the trip. When the car pulls away, hold L2 (LT on Xbox) to talk to the driver and press Triangle (Y on Xbox) to skip. Skipping costs a flat $100 however far you’re going.
The RydeMe app (once you open a bank account in Chapter 1)
RydeMe needs a bank account to pay with. You open one during a Chapter 1 mission, so before that the taxi is your only option. Open RydeMe on your phone and you can choose between your current safehouse, the marker on your map or a new destination. Pickups are quicker than with a taxi, but the fare climbs with distance. Skipping works the same way as in a taxi and also costs $100.
Neither a taxi nor RydeMe can reach you on islands without road access or in roadless swamp. Walk to a paved road and call again.
Cheaper ways to get around
| Option | How it works |
|---|---|
| Have your car brought to you | Call Joey the mechanic from your contacts and he’ll drop one of your registered cars nearby Good for: after a long taxi skip, when you don’t want to go back for the car you left behind |
| Autodrive | Set a destination on the map, then get in the car. Hold down on the d-pad to enter cinematic mode and choose the autodrive prompt at the bottom right. L2 and R2 switch between three speeds Good for: when you have time to spare and would rather enjoy the view and the conversation than drive |
| Buses and trains | Walk to a stop or station and catch one on its timetable. You can’t skip the journey Good for: keeping your travel costs down |
Saving and autosave
To save manually, go to Game in the pause menu, choose Save Game and write to one of the 15 slots. You can’t save by hand in the middle of a mission, so wait until it’s over and you’re free to roam.
- There is only one autosave. It sits apart from the 15 manual slots and is overwritten at points such as the end of a mission.
- Save your current game before loading an old one. Loading an earlier save also rewrites the autosave with that save’s progress. If you don’t want to lose where you are now, put it in an empty slot first.
- Use a different slot for each chapter. There’s no way to replay finished missions or pick a chapter to play again. Keep a separate save at the end of every chapter and you can go back to that point later. Saving before a mission you can’t afford to fail, such as a robbery, is also a good habit.
How the early game unfolds, chapter by chapter
The story is made up of a prologue and five chapters. You play the prologue as Lucia, and only autosave works during it. Once it’s over you can save manually, and in Chapter 1 Jason is free to roam the Keys. Chapter 2 mostly follows Lucia, and partway through it you can switch between the two whenever you like. The main story alone runs roughly 50 to 80 hours, while finishing the side content and collectibles takes around 200.
| Chapter | What opens up |
|---|---|
| Chapter 1 the Keys, mostly Jason | Paradise Taxi. Ammu-Nation. Joey’s mod shop, with free car delivery and repairs. Kenton’s shipwreck hunts. Brian and Donnie as buyers for stolen goods. The BuckMe account, RydeMe and WAiNK |
| Chapter 2 Port Gellhorn, mostly Lucia | Moses’s shop (Slim Jim, car registration and buying, Scooter Bros). The real estate app and garages. Dunk as a buyer. Pawn shop robberies. Switching freely between the two |
| Chapter 3 Vice City | Registering and selling at Pay ‘n’ Spray. Tyrone and Yasmani as buyers. Robberies at jewelry stores, small banks and payday loan stores, plus the tool that stops dye packs. Randy and the key duplicator |
Easy-to-miss things
- Optional missions in Chapter 1. Some disappear once you leave the Keys, so clear any optional missions showing on the map while you’re still there.
- Missions marked with an hourglass. They’re time-limited and vanish as the story moves on. Do them as soon as you find them.
- Things you can only do at Jason’s house. The five books, the house repairs, and the balcony meditation that starts when you talk to Lucia in the kitchen one morning partway through Chapter 1 are all gone once Chapter 1 ends (Life at the safehouse).
- The worst Criminal Profile level. Once you drop to Irredeemable, there’s no coming back (Criminal Profile).
What you lose at the end of Chapter 1 (minor story spoilers)
During the mission that closes Chapter 1, all the cash in your wallet disappears and you can no longer return to Jason’s house. The only money that carries over is what you’ve put in your BuckMe savings. Once you reach the late part of Chapter 1, deposit your cash at an ATM, move $5,000 into savings, and then make a manual save in an empty slot.
The phone: opening it and the apps you start with
Pull out the phone with up on the d-pad (on Xbox too) and open apps with Cross (A on Xbox). On the home screen, Square (X on Xbox) lists reminders such as fresh news and people waiting for a reply, which makes it easy to catch anything you missed. There’s no keypad for dialing numbers; you can only call people in your contacts.
| App | What it does |
|---|---|
| WhatUp | Messaging with other characters |
| Contacts | Phone calls. This is also where you call Paradise Taxi or your mechanic |
| Camera | Photos and selfies |
| Gallery | Look back at the photos you took with the phone camera |
| Snapmatic | Browse and follow other people’s posts. You can’t post anything yourself |
| Fitness | A record of your weight, meals, calories, exercise and sleep |
| News | Local headlines from around Leonida |
| Weather | Current conditions and the next day’s forecast |
| Settings | Change the wallpaper and ringtone. Any add-ons fitted to the phone are listed here too |
Apps you unlock through the story
- BuckMe: the bank account you set up in the Chapter 1 mission Buck Me. It pays for RydeMe and bigger purchases.
- RydeMe: the ride-hailing app, available once you have an account (Fast travel).
- WAiNK: the car scanner. Hold up on the d-pad to open it directly, then point it at a car and hold R1 (RB on Xbox) to see the key, alarm, tracker, the tool you need to get in, the sale price and the registration cost (Stealing cars).
- Scooter Bros: available after you meet Moses in Chapter 2. It handles bringing your car to you, repairing it and getting it out of the police impound.
- A real estate app: from partway through Chapter 2, it lets you buy garages to keep your cars in.
The police scanner isn’t something you buy. Cal Hampton fits it to your phone in Chapter 1, and it then shows up in the Settings app. From that point on, whenever you commit a crime or have the police on your tail, you automatically hear their radio traffic and dispatch calls.
Setting a destination on the map
Open the map with the touchpad on PS5 or the View button on Xbox; you can also get to it from the map tab in the pause menu. Move the cursor to where you want to go and press Cross (A on Xbox) to set it as your destination, and a pink route appears on the minimap. You can only have one destination at a time, so placing a new one removes the old marker.
To skip the map altogether, hold down on the d-pad while on foot. Time slows and a list appears of nearby shops, your markers and story missions; pick one and press R3 to get directions to it. A quick tap of down just shows your current objective and the minimap.
Taking pictures in Photo Studio
Choose Photo Studio in the pause menu, or press Square (X on Xbox) while paused to jump straight in. It’s available from Lucia’s prologue, and some settings can even be adjusted during cutscenes (anything unavailable is grayed out).
| To do this | Button |
|---|---|
| Move the camera | Left stick |
| Turn the camera | Right stick |
| Zoom in or out | L2 / R2 (LT / RT on Xbox) |
| Hide the on-screen interface to check the shot | Triangle (Y on Xbox) |
| Save the picture | Cross (A on Xbox) |
| Exit | Circle (B on Xbox). Any changes you haven’t saved are lost |
You can adjust the camera speed, a grid to help with composition, tilt, aspect ratio and field of view. Up to five lights can be placed, which helps keep faces bright in night scenes. Photos taken with the phone camera are separate and go to the phone’s Gallery.
Where to change clothes and how to buy them
There are three places to change your outfit.
- The closet at your safehouse. Everything you buy ends up here. It’s split into full outfits, tops, bottoms, shoes and accessories (hats, glasses, jewelry and watches), and you can save a combination you’ve put together as an outfit of its own.
- Fitting rooms in clothing stores. They open the same screen as the closet, so you can change into anything you own.
- Your car’s trunk. A registered car holds up to five outfits. How to load them is explained in the clothes row of the wanted level table.
Hats and glasses can be taken off anywhere from the items side of the weapon wheel. That alone won’t clear the clothes icon the police have on you, though.
Buying clothes in a store
Walk up to a rack and inspect it to browse the items, and you can try them on right there to compare. Buying an item sends it to your closet; if you want to wear it straight away, choose the option that buys and puts it on at the same time. Stores come in five types (casual and streetwear, sportswear, formal, souvenirs and swimwear, and secondhand) plus shoe stores, and the store icons on the map show the type and brand. Stores of the same brand carry the same stock, so visit different types of store if you want more to choose from.
Switching weapons, how many you can carry, and buying more
Tap L1 (LB on Xbox) to holster your weapon and tap it again to draw it. Hold it to open the weapon wheel, and use R1 (RB on Xbox) to flip between the weapons and items sides. If holding the button is a strain, the accessibility settings let you open the wheel with a single press instead.
- You can carry two one-handed and two two-handed weapons. Only one long gun fits on your back; the second one has to be carried in your hand as you walk, which draws attention from police and passersby.
- Spare guns go to a locker. Guns you can’t carry are moved automatically to your Ammu-Nation weapon locker. Ammo, body armor and explosives bought at Ammu-Nation go straight into the trunk of your registered car.
- In the menu, Cross (A on Xbox) equips, Circle (B on Xbox) drops, and Square (X on Xbox) moves items in or out of the trunk.
Shopping at Ammu-Nation
There are 24 stores in four sizes, and only the six largest sell sniper rifles and launchers. Cash covers purchases up to $999; anything pricier, including weapon variants, has to come out of your BuckMe account. The more you buy, the more guns and parts become available, and new stock can be bought at any store. GTA+ members who switch on the GTA+ benefits under the account section of the settings get 10% off at weapon, clothing, hair, tattoo and car modification stores.
Life at the safehouse: sleeping, training and stashing cash
| Activity | Effect |
|---|---|
| Rest in bed | Pick a time to wake up and skip ahead. Restores health and stamina in full and gives Focus a temporary boost |
| Weights just outside the house | Builds strength and raises your maximum health |
| Punching bag in the shed after the bedroom is fixed | Builds endurance and stretches your stamina |
| Basketball | Trains Focus |
| Fishing off the dock after the fishing mission | Trains Focus |
| Reading books | Trains Focus |
| Feeding a mouse to Dolores, the pet corn snake about once a day | Helps Focus |
| Shower | A short-lived physical buff |
| Bathroom sink | Washes off blood |
Strength and endurance you’ve built up slowly fade if you stop training.
Sleeping to pass time
Go to the bed, choose to rest, and press Square (X on Xbox) to pick when to wake up. One in-game hour lasts six real minutes, so a full day takes 2 hours 24 minutes. Sleep through to nightfall if you’d rather move under cover of dark, or to morning for photos in the early light.
Hiding cash and fixing up the house
- Bedroom floorboard. You can stash and withdraw money under a loose floorboard. Money kept there isn’t lost when you die or get arrested, so keep any sizable sum here until you have a BuckMe account.
- Mailbox by the road. Some mission rewards are paid in cash to the mailbox. If a payment hasn’t come through, check here.
- House repairs. You can fix four things: the stairs, the roof, the railing and the bedroom wall, and you get to pick the wall’s color. Each repair improves things with Lucia.
- The five books in the house. You can’t read them after Chapter 1 ends, so pick them up early.
How Jason and Lucia differ, and how to train them
The clearest difference between the two shows up in hand-to-hand fighting. Jason wins by landing heavy blows, while Lucia uses kickboxing: quick kicks, sweeps and grappling to throw opponents off balance. Focus works the same way for both of them, and each has their own Criminal Profile.
| Who can take it | Side content |
|---|---|
| Jason only | Bret’s hunting, Pete the pilot’s flights, and Yago’s races from the second one onward |
| Lucia only | Andy’s requests (Chapter 3) |
| Either | Kirk’s cryptid hunt, and requests from Moses, Yasmani, Randy, Cal and Shirley (Chapter 1 only), among others |
The three stats and how to raise them
There are three stats, strength, endurance and Focus, and each goes up to level 4. Jason and Lucia develop separately, so training one does nothing for the other. You can check current levels in the characters section of the pause menu or in the Fitness app on your phone.
| Stat | What it raises and where to train |
|---|---|
| Strength pink heart | Maximum health. The kettlebells, bench press, deadlift, squat rack and pull-up bar on the terrace at Jason’s house (free from Chapter 1), or the gym equipment |
| Endurance green lightning bolt | Maximum stamina. The punching bag in the shed under the house, or the gym treadmill and exercise bike. Running, cycling, swimming and kayaking outdoors also count |
| Focus purple eye | How long you can use Focus in a fight. Shooting ranges, golf putting, pool, fishing (only fish you actually land), meditation and basketball at the house. While you’re at Professional or Hardened, taking people down without killing them trains it too |
- Finish every workout. One session is roughly three exercises, and stopping halfway gains you nothing. Keep going until the on-screen message says the workout is done.
- Eat and rest before you start. Training hungry or short on sleep slows your progress.
- Protein afterward, then sleep. A shake from the fridge at home, or a protein bar from the gym or a vending machine, shortens the wait before the next session, and sleeping lets you start the next one. Strength and endurance can only grow so much per day, so build them up a little each day.
- Don’t leave long gaps. Skip training for a stretch of days and strength and endurance drop. The Fitness app shows how long until your next session. Focus never goes down once raised.
- Go to the gym as a pair. Membership is bought at the front desk, and one membership covers both of them. Take both to the gym and when one works out, the other’s session is completed at the same time.
For quick Focus gains, head to the shooting range on the northeastern edge of Port Gellhorn (Rodgers Ranch & Shooting Range). Pay $5 at the counter for a pass, then keep running the easiest market shooting challenge, which takes only seconds, and quitting out. Each run nudges your Focus up.
Weight and what food does
Weight goes up or down with the gap between what you eat and how active you are, and the Fitness app shows which way you’re heading. Being heavier or lighter makes no noticeable difference to running speed or fighting, so pick whatever look you like. To slim down, eat less and keep up endurance training. Coffee and tea give Focus a temporary lift and snacks do the same for health; both wear off if you die or restart.
Switching between Jason and Lucia
You can switch freely between the two from Chapter 2 onward. Keep the d-pad held to the right and tap R1 (RB on Xbox). A quick tap of right detonates any explosives you’ve planted instead, and holding right by itself opens the menu for giving your partner orders.
The character you aren’t playing doesn’t stand around waiting; they carry on with their own business. While one of them is resting at home or traveling somewhere, their portrait goes gray and you can’t switch to them. Some missions belong to Jason or Lucia alone, which the map icon makes clear. Switching is locked during those, and a few missions hand control from one to the other at fixed points.
Their relationship and your Criminal Profile
Jason and Lucia start the story as a couple, and how close they are sits on one of four tiers. From lowest to highest: Running on Empty, Partners in Crime, Crazy in Love and Hot Together. You can check the current tier in the characters section of the pause menu, or in the menu that opens when you hold right on the d-pad. Even at the bottom they don’t split up; they just carry on as partners in crime, and neither of them drops out of the story. Their closeness changes some conversations and scenes. There are multiple endings, and choices late in the story decide which one you see.
| Direction | What causes it |
|---|---|
| Grows closer | Holding hands (R2, RT on Xbox) or touching (hold L2 and press Square; LT and X on Xbox), answering texts and calls, going out together for mini golf, scuba diving, clubs, skydiving, the gym, the pool or kayaking, pulling off robberies together, buying food or drinks, spending the night together, and building up savings in BuckMe |
| Drifts apart | Ignoring texts and calls, leaving your partner behind, failing missions you take on together, hitting your partner with a car, and choices your partner doesn’t like |
Being close doesn’t make either of them better in a fight or easier on the wanted level. When things have cooled, holding hands and kissing aren’t available, and they come back once the relationship warms up again.
On top of your wanted stars, Jason and Lucia each have their own rating called the Criminal Profile. It has five levels, from least to most violent: Professional, Hardened, Violent, Psycho and Irredeemable. Hurting and killing people moves you toward the heavier end, and if you keep rampaging at Psycho you’ll sink to Irredeemable, the worst level. You can move back and forth between the other four, but Irredeemable never goes away. Up to Violent you can still surrender to the police; from Psycho on that option is gone and officers start shooting right away. Taking people down without killing them, for example by shooting an arm or a leg, moves you back toward Professional.
Wanted level and losing the police
The wanted level tops out at six stars, and at six the search can stretch across the whole map. Police piece together what they know from witnesses, alarms and security cameras, and icons under your stars show what they have: your face, your clothes, your car, your weapon and whether the two of you were seen together. Shaking them off means clearing those icons one at a time.
| Icon to clear | How |
|---|---|
| Clothes | Change somewhere out of sight. Swapping only your hat or sunglasses won’t clear it. Your own car’s trunk holds up to five outfits: hold Square (X on Xbox) at the closet at home to load them, and you can change while you’re out |
| Face | A mask put on before the crime keeps your face out of it, although the clothes, car, weapon and pair icons can still show up. A new hairstyle or accessories also make you harder to pick out |
| Car | Abandon the car that was seen, or have it repainted at a paint shop |
| Pair | Holding the d-pad to the right opens the partner menu, where you can tell them to split off. Once you separate, the character you’re playing drops one star. If either of them is caught, you’re both busted |
How to pull off a robbery
The further the story goes, the more places you can rob. Finish a job unseen and your Criminal Profile stays on the Professional side. Bank robber Raul Bautista is also around, on the lookout for capable people.
| Available | Targets |
|---|---|
| From the start | Gas stations, liquor stores and diners |
| Partway through Chapter 2 | Pawn shops |
| Partway through Chapter 3 | Jewelry stores, followed by small banks and payday loan stores (you need a tool that stops dye packs) |
| End of Chapter 4 | Bank vaults and armored cash trucks |
A store robbery goes like this.
- Leave a ride by your exit. Park a fast car or motorcycle close to the door you plan to leave through.
- Go in with a mask on. Forcing a liquor store’s back door alerts the owner. Use a snap gun on a jewelry store’s back door instead of kicking it in.
- Kill the alarm and cameras. Switch off the alarm panel in the back room and destroy the camera footage or hardware. Focus makes doors linked to the alarm glow red and doors that are safe to open glow white.
- Open the safe. Get the combination from a note or from an employee, or blast it open. Explosives destroy some of the cash inside and bring the police sooner.
- Change clothes and cars. Put on an outfit from the trunk and swap or repaint the car you arrived in before heading home.
How to hit each kind of target
Small stores (gas stations, liquor stores, diners)
- Point a gun at the clerk and the register opens. For the safe in the back, get the code from a note in the store or from an employee. Focus lets you pick out which employee knows it.
- Destroy the security cameras, footage and all, in the back room. Cameras that upload to the internet can’t be destroyed and trip the alarm after a while, so don’t hang around. A mask, hat or glasses make it harder for cameras to get your face.
- Customers may fight back. A shopper might pull a gun and get in your way. Shooting them dead makes your Criminal Profile worse.
- Expect one or two stars. Officers don’t appear on the minimap, so keep your eyes open as you leave. A store you’ve hit closes for a while and leaves a red zone around it; go back in and the police respond faster.
Pawn shops (from Chapter 2)
There are 15 around the state. Threaten the clerk, smash the display cases and open the safe in the back too. The clerk sometimes gives up the safe code, and the code is different in every playthrough. Breaking a case or a door gets you two stars, so leave a fast motorcycle or something that handles rough ground out front. Dunk in Port Gellhorn buys what you take.
Jewelry stores (from Chapter 3)
They become targets once you take Yasmani’s job in Chapter 3. There are 20 in the state. The safes in the three stores from his first job always use the same codes.
| Store | Safe code |
|---|---|
| Casa de Empeño | 1680 |
| Richardson Jewelry | 6815 |
| Donovan Banks & Co. | 0104 |
- For a quiet job, use the back door. Pick its lock with a snap gun, cut the alarm panel and wreck the camera footage before opening the safe. Kicking the back door in sets off the alarm.
- Going in loud? Wear body armor. Smash the display cases and blow any safe you don’t have the code for with sticky bombs. Hit several stores in a row and you can be at four stars by around the third.
- Sell to Yasmani. He pays the most for jewelry. Takings depend on the store’s tier; Richardson Jewelry brings in around $4,500 to $12,000.
Small banks and payday loan stores (from Chapter 3)
Teaming up with Raul’s crew in the Chapter 3 mission Credit Check gets you the tool that stops dye packs, opening up 14 small banks and 7 payday loan stores. Without it, the dye hidden in the cash bursts once you’re away from the building. Threaten the tellers for the cash in their drawers and open the vault in the back as well. A job brings in roughly $5,000 to $45,000, and among the payday loan stores, the one in Little Cuba pays better than most.
Big bank vaults and armored trucks (from the end of Chapter 4)
An optional mission at the end of Chapter 4 adds the vaults of eight big banks to your list.
- Tail an armored truck. Follow it at a distance and wait for it to arrive at the bank.
- Slip in while it’s open. The vault only opens while guards carry the cases inside, so follow them in. More guards are waiting inside.
- Split the bags. Each person can carry two bags, which isn’t enough for everything in the vault. Keep the d-pad held to the right and tap Circle (B on Xbox) to pass a bag to your partner, and between you that makes four.
- Escape on a bike, then switch vehicles. You get four stars the moment you walk in. Break through the cordon on a fast motorcycle and change vehicles along the way.
A single job can be worth up to about $205,000. Finish two payday loan store jobs and Yasmani will tip you off about armored truck routes for $10,000 a time. You can also open a truck out on the road by sticking a sticky bomb to its rear doors.
Gang hideouts
Nine gangs have 39 hideouts between them, and each shows up on the map as a yellow icon once you enter its area. Hover over an icon to see how heavily it’s guarded and what the main loot is. Every hideout has armed lookouts, so take them out quietly with a suppressed gun. You’ll find cash in safes, drugs, watches and weapons you can’t get anywhere else, and a hideout you’ve raided restocks after a while. Tyrone pays the most for the drugs.
What working as a pair makes easier
- Twice as many bags. Two per person, four between you.
- Keep your partner on standby. From the menu you open by holding right on the d-pad, you can leave your partner in the car and call them in later.
- Split up to escape. Going separate ways clears the pair icon (Wanted level).
- It helps the relationship. Pulling off a robbery together brings the two of them closer.
Stealing cars, trackers and repairs
Even a moving car can be taken: walk up and open the door, and you’ll haul the owner out and get in. If anyone sees it, they’ll call the police. A parked car can be opened in three ways.
- Smash a window. Press Circle (B on Xbox) to break the glass, then hotwire it with an input that uses both sticks. If the car has an alarm, it will go off.
- Slim Jim. Used with Triangle (Y on Xbox). Moses gives you one in Chapter 2.
- Key duplicator. Press Triangle (Y on Xbox) and complete a short input. Randy gives it to you in Chapter 3. Luxury cars that start without a key can’t be hotwired, so they need this tool.
Before getting into a parked car, hold up on the d-pad to scan it with the WAiNK app. It tells you the key type, alarm, whether it has a tracker, sale price, registration cost and which tool will get you in (a quick tap of up brings out your phone).
Trackers come in two kinds. A standard tracker doesn’t tip off the police, but you can’t modify the car until you register it. A car with an advanced tracker shows a red icon near the engine and fuel icons at the bottom left, and it reports your location to the police only while you drive slowly or stand still. Keep up your speed and nothing gets through. Stolen cars can be sold to Moses early on and to Pay ‘n’ Spray later, but Moses turns down any car with a tracker.
| What you want | How | Cost |
|---|---|---|
| Repair your car | Pull up to a gas station pump and choose repair from the service menu. You refuel here as well. The pump only fixes light damage; for anything serious, go to a mod shop or Pay ‘n’ Spray | Depends on the damage |
| Call, repair or recover your car from the impound lot | The Scooter Bros app once you’ve met Moses in Chapter 2. Until then, phone Joey the mechanic. Only registered cars without a tracker can be brought to you | Scooter Bros starts at about $100 a call and costs more the farther away you are and the worse the damage. The top membership makes three uses a day (in-game) free. Joey is free |
| Skip the drive to your destination | Take a taxi or a RydeMe ride (Fast travel) | $100 on top of the fare |
| Store more cars | Buy a garage (Garages). The Vintage Vice City Pack and Ultimate Edition garages also have a weapon locker and space for stolen goods | $4,000 to $40,000 per space |
| Use the lights and other car functions | While driving, hold left on the d-pad for the vehicle menu (a quick tap works the left turn signal) | Free |
The more often you call for your car, the more the top Scooter Bros membership pays off. Members can also spend their free uses on getting a car back from the police impound.
Registering, modifying and storing cars
Register a stolen car and it becomes yours. A registered car stays with you even if you die, get arrested or leave it somewhere, and Scooter Bros can bring it back to you. Registering needs a free space in a garage or parking spot, so if you’re full, sell one of your cars or buy another garage first.
Where to register
| The car has | Where to register it |
|---|---|
| No tracker | Moses’s shop in Port Gellhorn, open to you once Lucia meets him in Chapter 2. Lucia’s first car is free |
| A standard tracker | Any Pay ‘n’ Spray from the start of Chapter 3. Registering disables the tracker and lets you modify the car |
| An advanced tracker | There’s no way to remove it. While you drive one, keep your speed up so the police can’t place you |
At the shop, get the respray done first and then choose to register. Resprays at Moses’s place are free, with a choice of five basic colors. The registration fee scales with what the car is worth, so a high-end car can cost tens of thousands of dollars. Scanning a car with WAiNK shows the registration fee next to its sale price, so you can decide on the spot whether to keep it or sell it.
Mod shops
The first one you can use is Joey’s place in the Keys, Coastal Auto Care, which opens up partway through Chapter 1. More mod shops appear as you explore and can be found under vehicles in the map’s list of locations. Each shop specializes in certain kinds of car. Common parts such as engines can be changed anywhere, but the special finishes made for a particular model are only available at shops marked with a blue wrench. The Ultimate Edition adds two exclusive shops that open early in Chapter 1.
Drive the car you want to modify through the shop entrance. Getting out and walking in won’t bring up the mod screen. A damaged car has to be repaired before you can pick parts. Pricier parts are paid for from your BuckMe account, so until you open it in Chapter 1 you’re limited to cheap mods. GTA+ members get 10% off at mod shops too.
| Mod menu section | What you can change |
|---|---|
| Performance | Engine, intake, transmission and acceleration boosts such as nitrous |
| Finish | Paint (including the paint type), wraps and license plates |
| Body | Hood, spoiler, bumpers, mirrors, exhaust and tow hitch |
| Wheels, interior | Wheels and parts inside the car |
| Model-specific packages | Sets that upgrade performance and looks together, made for that model |
What Pay ‘n’ Spray can do
- Repairs, resprays, registration and sales. All four under one roof.
- A respray clears the car icon the police have on you. Only basic colors are on offer. You can’t drive in while an officer has eyes on you, so lose any pursuit first.
- Selling your own cars. Registered cars and cars in your garages can be sold from the list of stored vehicles, one at a time or several at once. The money goes into your BuckMe account.
Who buys stolen cars
| Buyer | Cars and rough prices |
|---|---|
| Moses from Chapter 2 | Cars without a tracker, from about $1,000 each. After a sale he won’t take another one for a while, and he won’t buy cars stolen near his shop |
| Pay ‘n’ Spray from Chapter 3 | Cars with a standard tracker, about $2,500 to $4,000 each |
| Randy from Chapter 3 | Cars on his wanted list. One in good condition can fetch more than $30,000. Finish Randy’s special jobs and he’ll take cars with advanced trackers too |
Wherever you sell, scratches and dents bring the price down. GTA+ members get 10% more when selling their own cars.
Garages
From partway through Chapter 2 you can buy garages in the real estate app on your phone. Eight are for sale, each holding one car. Buying the lot costs $160,000, and owning all eight earns a trophy.
| Location (as named on the map) | Price |
|---|---|
| Mitchell Auto Center | $4,000 |
| Persistence Road | $7,600 |
| 7th Avenue | $12,000 |
| Store n’ Bolt | $16,800 |
| Wyatt Motors | $21,600 |
| Vela Rota Drive | $24,000 |
| Bonita Court | $34,000 |
| Atlantic Court | $40,000 |
The story also hands you garages for free: one space in Port Gellhorn in Chapter 2, two spaces in Chapter 4, and two more garages in Chapter 5 with two and three spaces. On top of these come the edition bonus garages and a one-car Crosstown garage for GTA+ members, which you can claim from Chapter 3.
Making money and keeping it safe
If you die or get arrested, you lose every dollar of cash on you. The basic rule is to move your earnings into your BuckMe account as soon as you can. Until you open it in the Chapter 1 mission Buck Me, hide your money under the floorboard in Jason’s bedroom.
How the BuckMe account works
- Deposits go through ATMs. You can’t deposit from your phone; use the BuckMe app to find a nearby ATM.
- Payments over $1,000 come from the account. Cash only covers cheaper purchases.
- Each character can carry up to $20,000 in cash. You can’t hold more than that, so bank it before a big score.
- The account has a balance cap. It starts at $15,000. Once you hit it, new payouts are held back until you spend enough to make room. The cap rises as the story advances or when you reach savings goals.
- Money moved into savings can’t be taken back out. In exchange, it’s safe from death, arrest and chapter changes.
| Total in savings | Account cap and perks |
|---|---|
| $5,000 | $15,000 cap |
| $10,000 | $100,000 cap. 20% off RydeMe |
| $100,000 | $500,000 cap. 20% off garages |
| $500,000 | $2,000,000 cap. 10% off wraps |
Where the money is, chapter by chapter
| When | Source and typical haul |
|---|---|
| Chapter 1 | Store robberies: $100 to $300 from the register, plus a few hundred more if you crack the safe. Kenton’s shipwrecks: around $1,400 for the first wreck, paid when you bring the treasure back to his shop. Cargo from a ship blown up at sea: about $1,500 to $2,000 once you’ve gathered it up Wallet cash disappears at the end of Chapter 1, so put your earnings in the account and in savings |
| Chapter 2 | Selling cars to Moses: from $1,000 a car, with a wait of about two minutes between sales. Pawn shop robberies open up too |
| Chapter 3 | Jewelry stores: $10,000 to $25,000 a job. Small banks: $5,000 to $45,000 a job. Selling cars to Pay ‘n’ Spray: around $4,000 each. Cars Randy wants: over $30,000 each |
| From the end of Chapter 4 | Big bank vaults: up to $205,000 in one go. Walking in puts you straight at four stars |
Casinos can’t be entered, and there’s no passive income such as stock trading or running a business. Money comes from robbing and selling.
Buyers for stolen goods
Drugs, jewelry and marked bills turn into cash at a buyer. Hover over a buyer’s icon on the map to see, for each kind of goods, how well they pay on a rough scale. In Chapter 1 payment lands in the mailbox outside the house; once you have an account, it’s transferred. Load the goods into your own car’s trunk and hand the delivery to your partner, and you’ll get a little less but won’t have to make the trip yourself.
| Buyer | Location and what they pay best for |
|---|---|
| Brian Chapter 1 | A warehouse in the southern Keys. Low prices for everything. Closes at the end of Chapter 1 |
| Donnie Chapter 1 | A trailer in the northern Keys. Fairly low for drugs, lower still for the rest |
| Dunk Chapter 2 | A trailer in southern Port Gellhorn. Fairly low for drugs and jewelry, lower still for bills |
| Tyrone Chapter 3 | Vice City (La Perle). The best price for drugs |
| Yasmani Chapter 3 | Vice City (Little Cuba). The best price for jewelry and marked bills |
You can’t walk out with marked bills until you have the dye-pack tool from Chapter 3. For where to sell stolen cars, see Registering, modifying and storing cars.
Food, fitness and Focus
Food from stores raises your maximum health for a while, and drinks give stamina and Focus a temporary lift. Items that help Focus are marked with a purple eye. You can eat and drink while walking, running, shooting or driving, so grabbing something before you head out gives you more breathing room in a fight.
Overeating puts weight on your character, and working out at the gym builds muscle, which fades if you stop training. Using a gym requires a membership. The bathroom mirror at your safehouse only lets you cut your hair and beard shorter or shave them off. Growing them out, changing the color or getting a new style takes a barber or salon, and hair doesn’t grow back on its own over time.
Focus slows time so you can take in your surroundings; press L3 and R3 together to use it. It also helps you work out where screams or sirens are coming from. Focus goes up when you eat, drink, have coffee or tea, freshen up at a sink, or pet a dog or cat (hold L2 as you walk up to it).
Things to do on the side
Leonida has more than 700 businesses, and every one of them is open 24 hours. You’ll find gyms, shooting ranges and a zoo, while buses and trains keep to a timetable. There are satirical TV shows to watch and podcasts to listen to, true crime among them. You can fish from a boat (anything you catch goes back in the water), scuba dive for treasure, fly crop-dusting runs, ride motocross through the mud and dance at clubs.
Characters
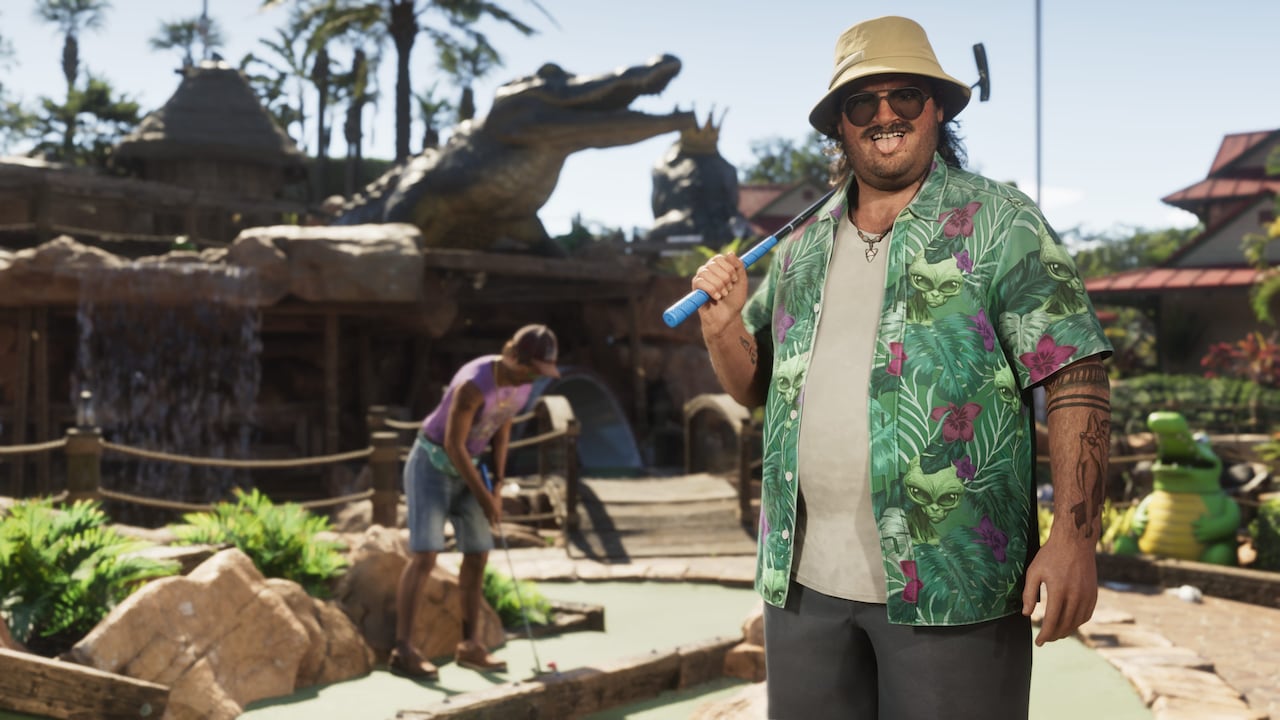
Cal Hampton
Jason’s friend and one of Brian’s associates. A conspiracy buff who listens in on Coast Guard radio from home.

Boobie Ike
A Vice City heavyweight who owns real estate, a strip club and a recording studio, and co-runs the label Only Raw Records.

Dre’Quan Priest
A dealer turned music man at Only Raw Records. He signed Real Dimez and is chasing success in Vice City.

Real Dimez
Rap duo Bae-Luxe and Roxy. They built a following on social media and, five years after their one hit, are going for a comeback.
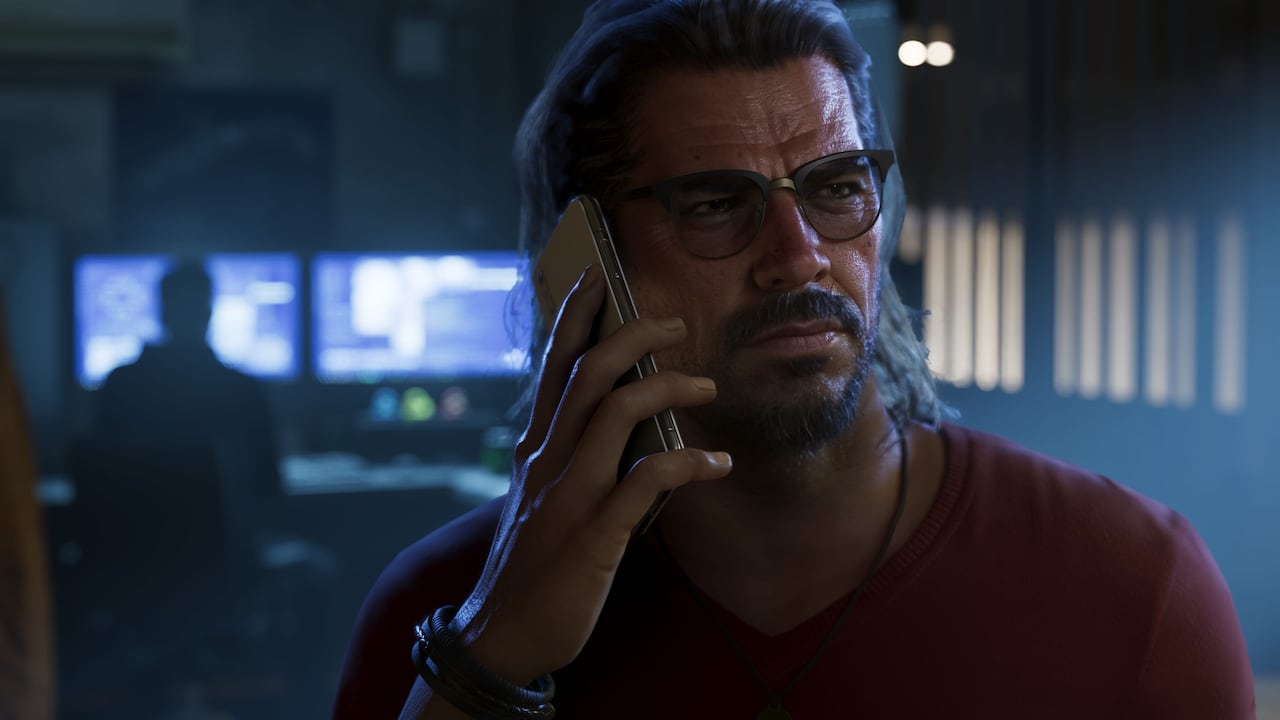
Raul Bautista
A seasoned bank robber looking for talent willing to take on risky jobs. His recklessness raises the stakes every time.
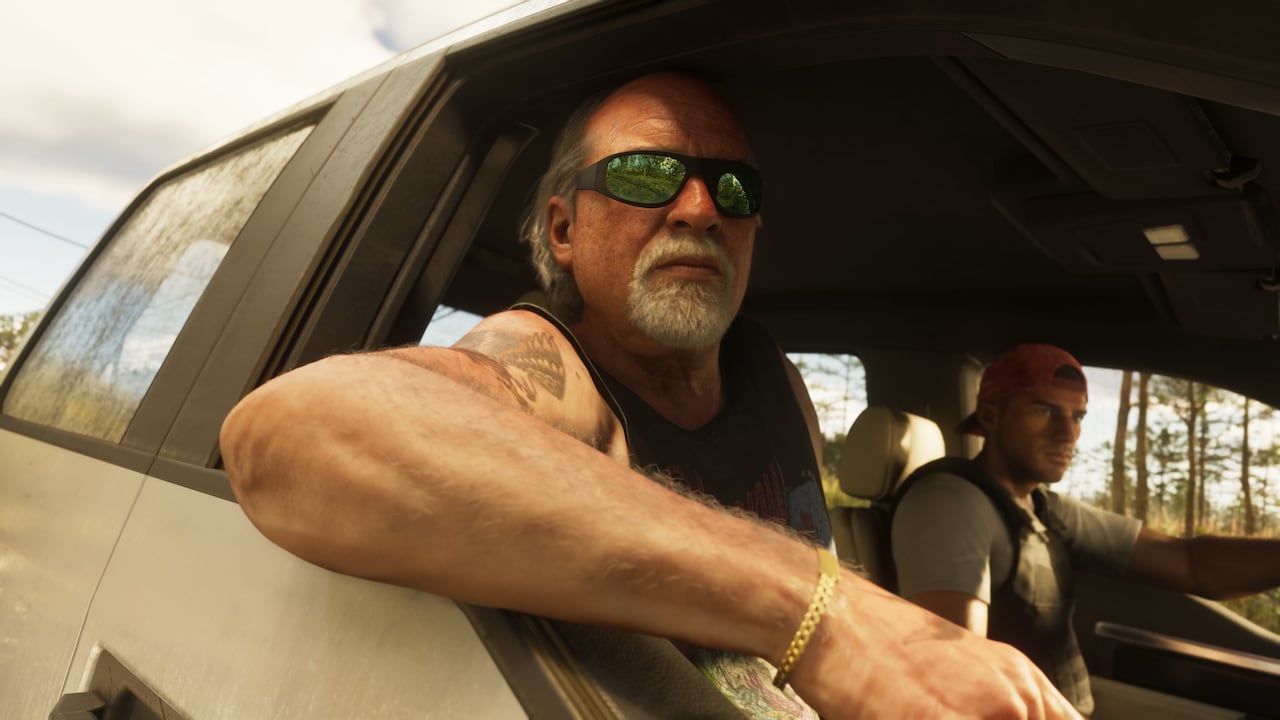
Brian Heder
A smuggler who has worked the Keys since the trade’s heyday. He lets Jason use his house in exchange for help collecting debts.
Lucia’s family once lived in Liberty City, and her mother has dreamed of a better life ever since.
Regions of Leonida
The six main regions of Leonida.

Vice City
The big city at the heart of Leonida. The setting of an earlier game in the series returns in present-day form and on a far larger scale. Southside Vice City is gang territory.
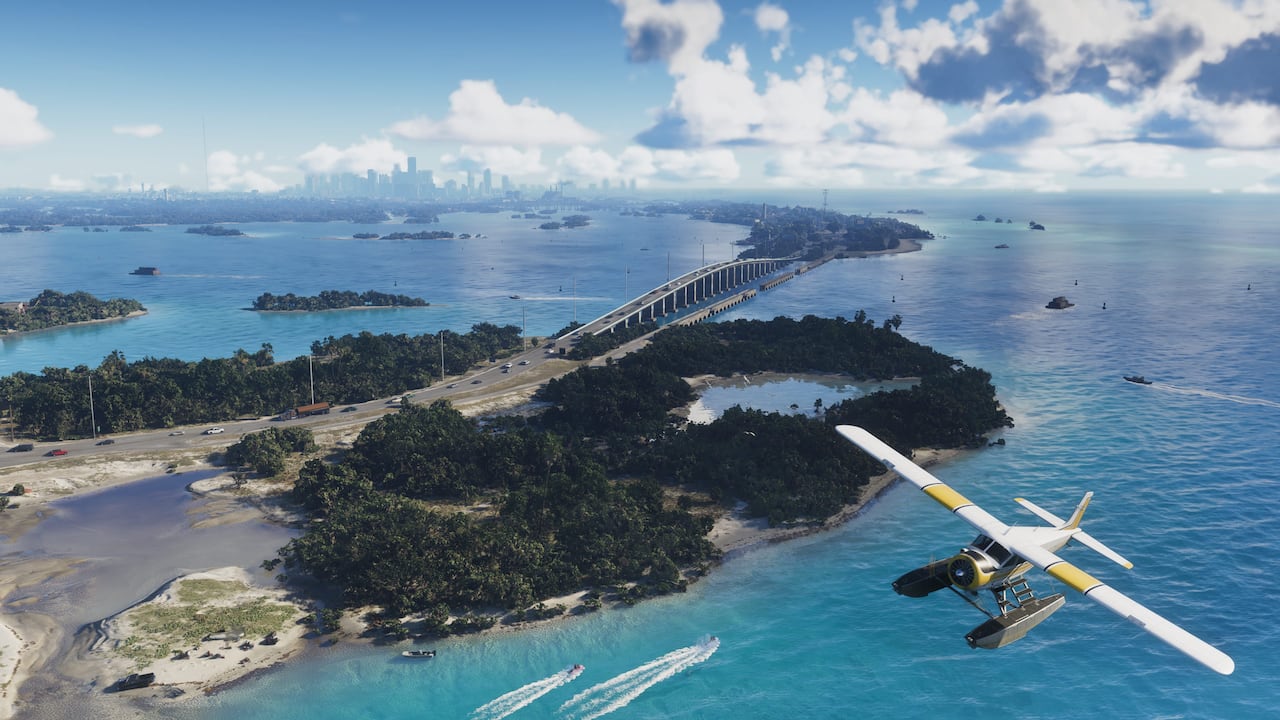
Leonida Keys
The islands to the south. Jason lives rent-free in a house owned by the smuggler Brian, who moves his goods out of a boatyard. Jason’s side of the story starts here.
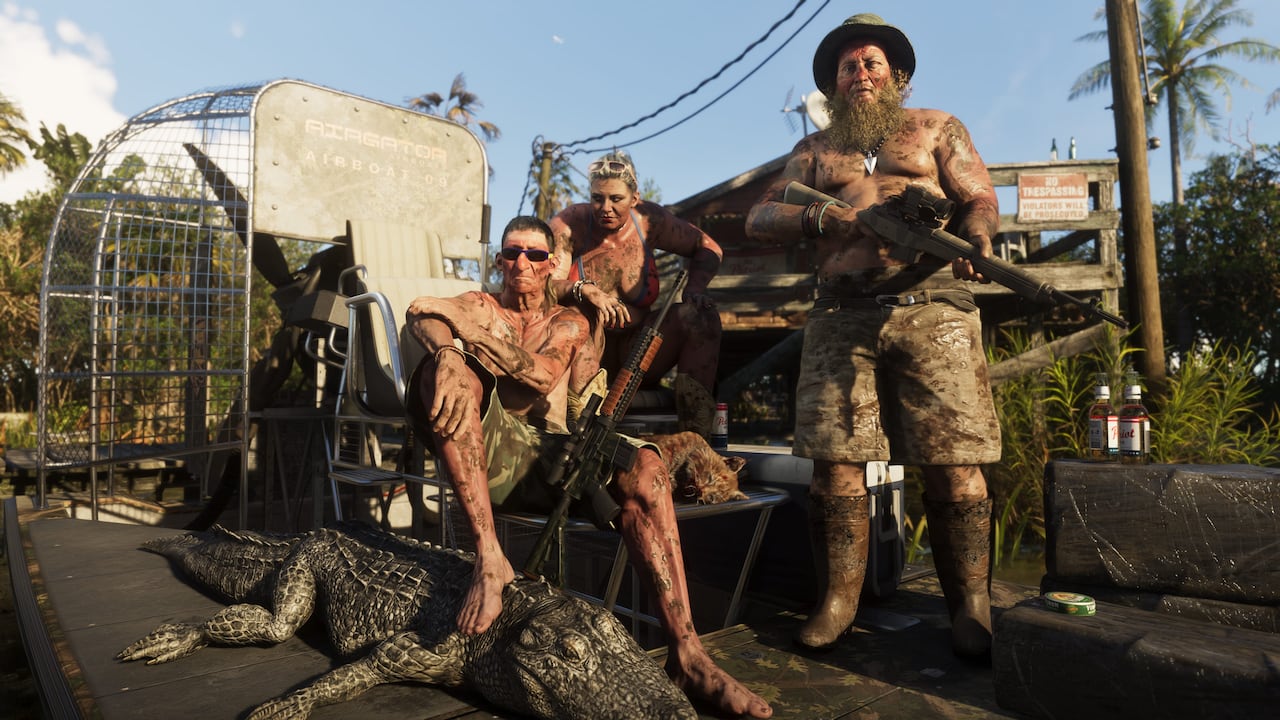
Grassrivers
Wetlands. Back Country Radio covers this area, and its reporters head out by airboat for live reports.
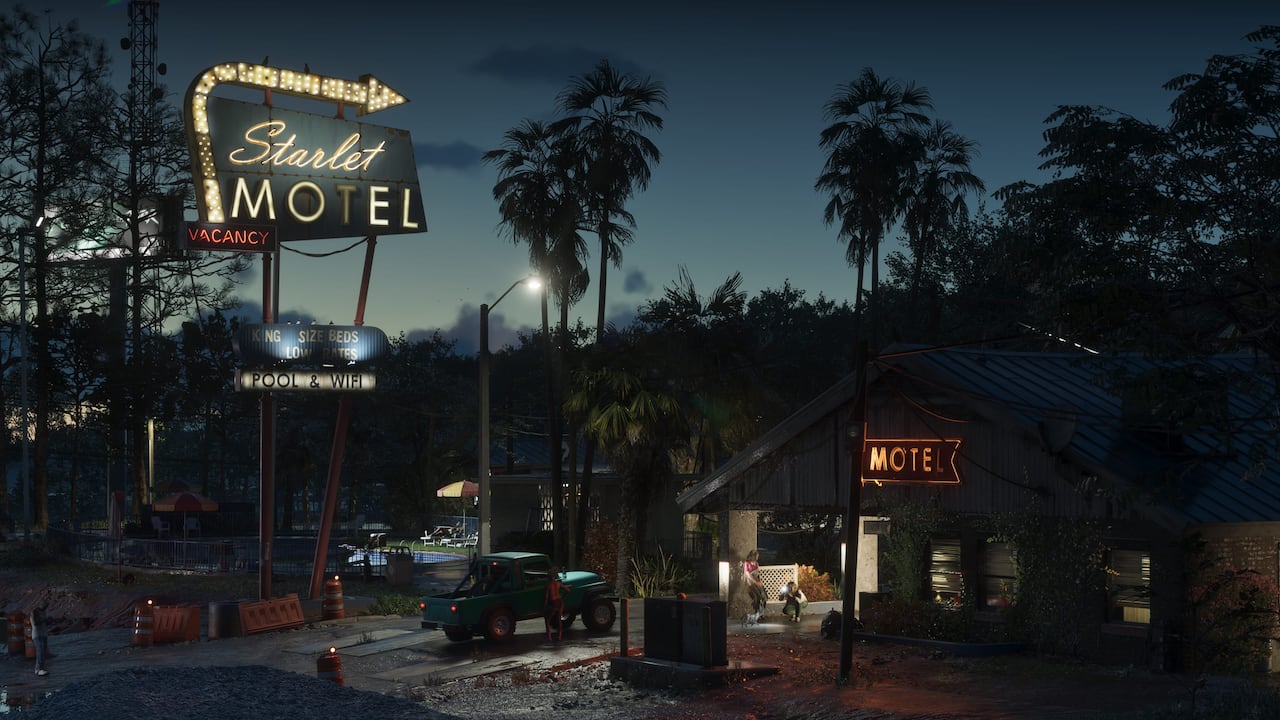
Port Gellhorn
A former resort town that has gone to seed, lined with tourist attractions that have shut down. The country station Back Country Radio names it next to Grassrivers as part of its coverage area.
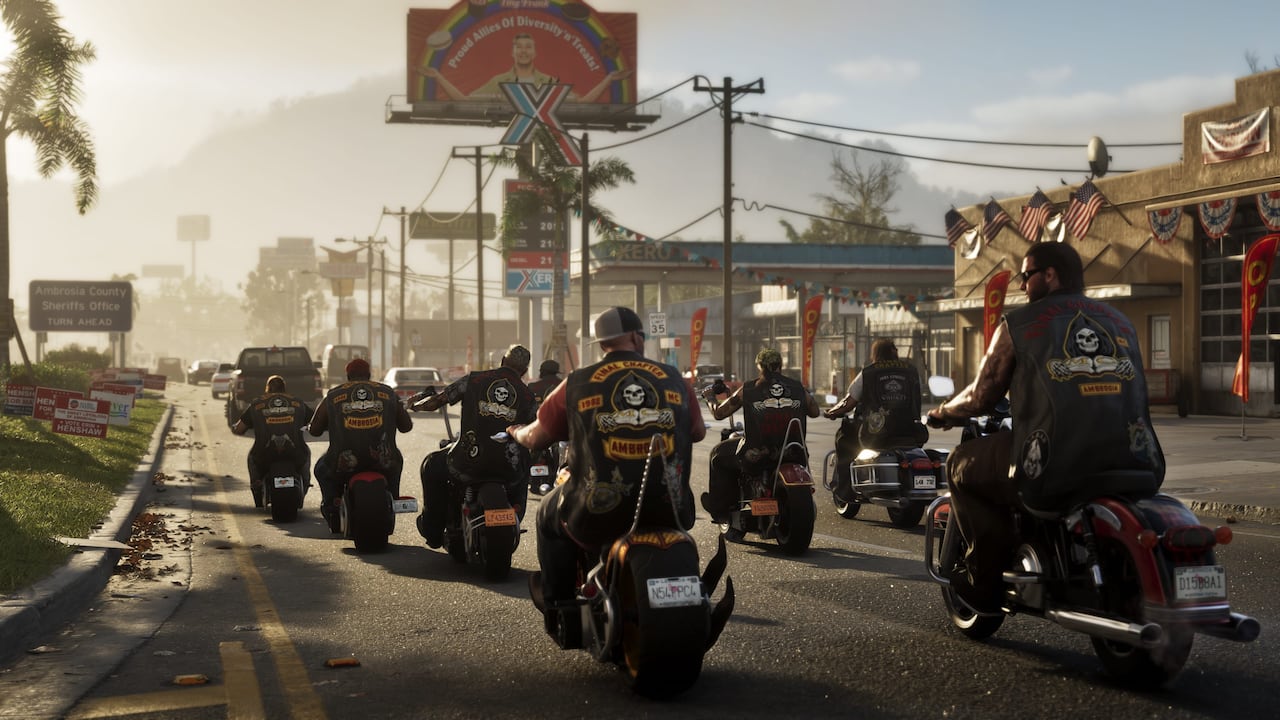
Ambrosia
An inland town of factories. Work comes from the Allied Crystal sugar refinery, while a local biker gang has its hands on most of what else goes on.
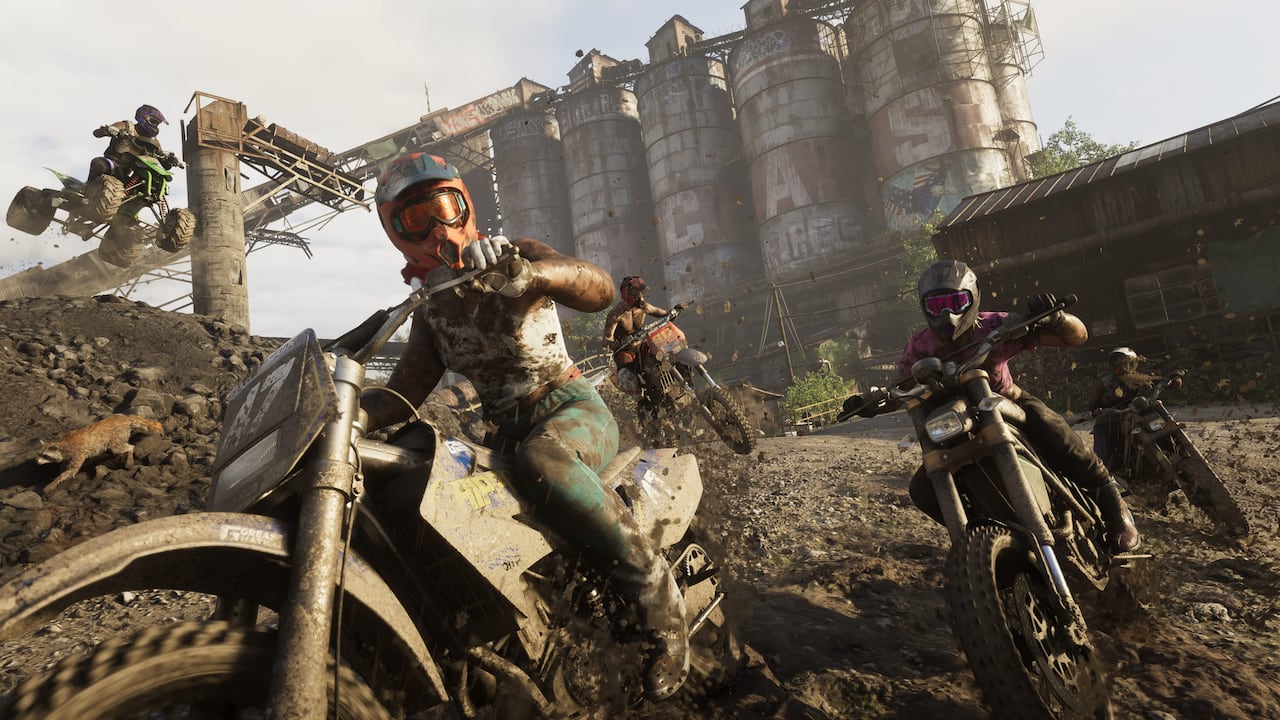
Mount Kalaga
A national park in the north of the state, with mountains and forest, plus hunting, fishing and off-road trails. The Ultimate Edition’s off-road Dominator Buggy is made for its backcountry.